
Are you new to chickens? Maybe you purchased chicks at the feed store on impulse, or maybe you’ve been thinking about adding chickens for a while. In any case, if you are looking for guidance on raising chickens, this article should answer all of your questions!
Table of Contents
Before you Begin
Before getting chickens, I recommend doing a little research. Planning ahead will not only make adding chickens to your family easier, but will also reduce the possibility you may have to get rid of them.
Are chickens allowed
Check with your local COA, HOA or code enforcement to ensure chickens are permitted in your area. Many places have laws and regulations that prohibit chickens, or at least restrict the number you are permitted to have.
Time Commitment
We all have busy lives, but we also need to make sure we have time to properly care for any pets or livestock before adding them to our family.
Chicks will take up the most time and energy, as they need to be checked a few times each day to fill feeders, waterers and clean them as they get dirty.
Adult chickens only need checked once daily (collect eggs, check feed and water), more if you are free ranging them. I have my flock of about 50 set up with large capacity containers so they only need to be fed weekly and watered once every 2-4 weeks. With this setup, I only need to spend about 30 minutes once a week to refill everything, and about an hour once a month to clean.
Count your chickens
Next, decide how many chickens you want to have. If you have regulations in your area, this question may be answered for you. However, if there are no restrictions, consider how many eggs your family needs on a daily or weekly basis.
The most common chicken breeds lay 4-5 eggs per week. So if your family averages 20 eggs each week, I would get 6-7 chickens. It’s always better to have a few extra eggs than not enough.
Chicks or pullets
Will you be starting with chicks from the feed store, or would you like to find a point of lay pullets? If you purchase chicks, keep in mind that they won’t lay eggs until they are 6-9 months old (or older!). If you are wanting eggs now, look for point of lay pullets. Point of lay pullets are young female birds (called pullets) that are of egg laying age (point of lay). Try to avoid birds that are around or older than 2 years old, as they will have a significant decrease in egg production in comparison to a younger bird.
What breed
Lastly, what breeds of chickens would you like to have? Some folks are pretty particular about egg shell color, feather color or pattern, behavior, etc.. If you are not concerned about these, then any breed offered at the local farm supply store should be a good egg laying breed. If you are wanting specific birds, you may be better off ordering through an online retailer and having birds shipped to you via USPS.
Common Terms
In either case, there are three terms to be familiar with: Cornish (or cornish cross), Straight Run, and Bantam. Read the full list of common poultry terms here.
Cornish
Cornish and cornish cross birds are a meat bird. They are meant to grow big and fast, and be ready to butcher at 6-8 weeks old. These birds cannot be kept as a pet, and is inhumane to try and keep them alive longer than 8 weeks. They will become so heavy that they cannot stand, will scrape their bellies on the ground, and often die of heart failure if not butchered. Cornish are sold in the feed stores, and unless you want meat birds, do not purchase them.
Straight Run
Straight run is a random mix of male and female chicks. Often straight run chicks are less expensive, however, anticipate that about half of these birds will be roosters. Roosters are often difficult to rehome, even if you are giving them away for free. If you purchase 12 chicks and find yourself with 6 roosters in a few months, what will your plan be? Having more than one rooster in a flock will eventually lead to roosters fighting (often to the death), and many places do not allow roosters. This is just something to keep in mind so you can plan accordingly.
Bantam
Bantam chickens are smaller breeds, “mini chickens” if you will. These birds are about half the size of a standard breed chicken. Because they are smaller, they will lay smaller eggs, and generally lay fewer eggs per week than their standard sized counterpart.
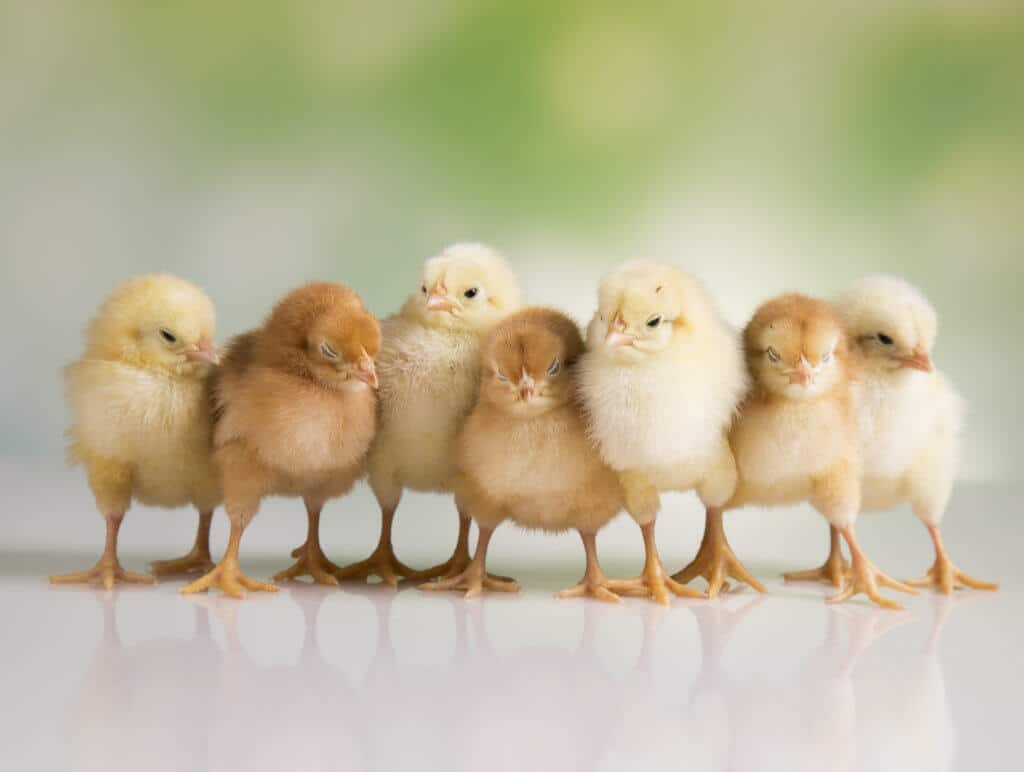
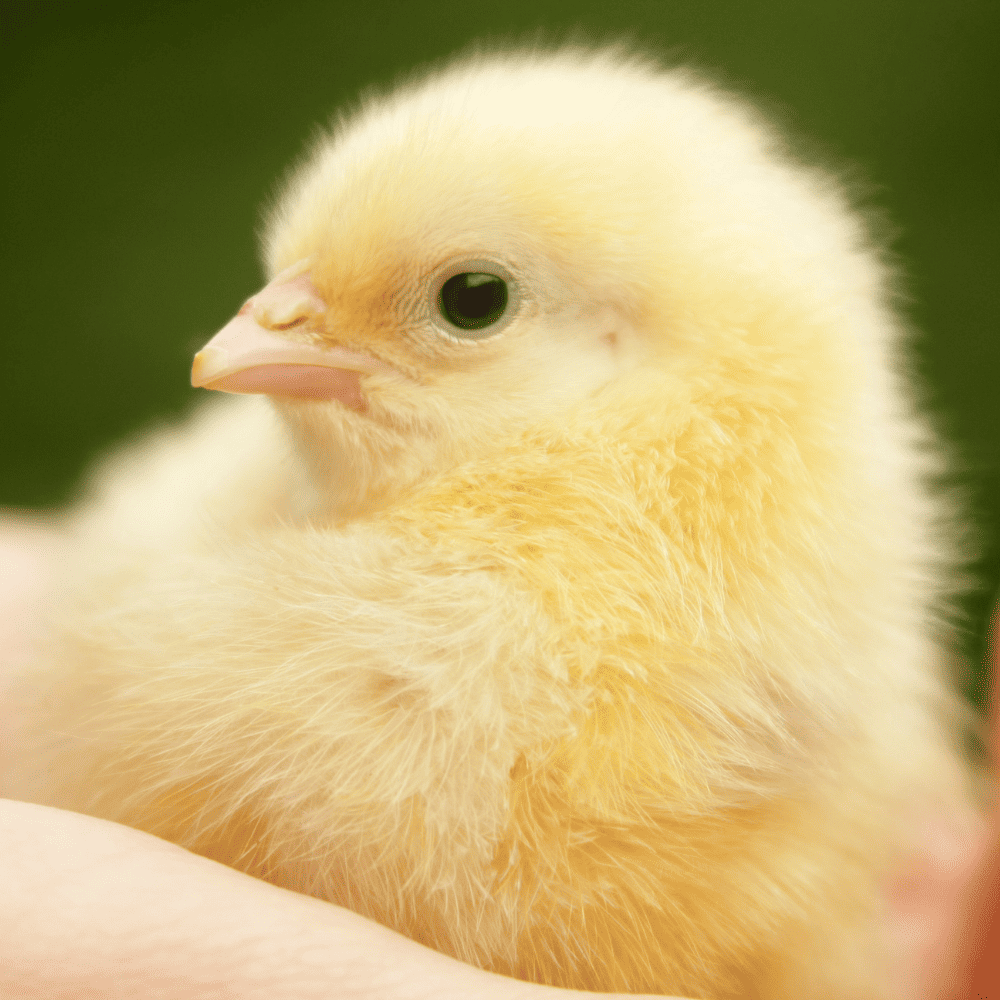
Raising Baby Chicks
Most people enter the wonderful world of chickens by raising chicks. Not only are they cute, but raising chicks is an exciting project for adults and children alike.
As a child, we raised chicks on a number of occasions. I feel that it was these experiences that stuck with me and are a major reason I am the way I am today!
Raising chicks is relatively simple and only requires a few supplies to be successful.
Buying Chicks
Chicks are often available at your local feed store. If you are not able to find them, be sure to check with the chain stores and the family owned ones as well.
If the feed stores do not have what you want, you can order chicks online. There are a number of different hatcheries, but a few of the more popular ones are Murray McMurray, Cackle Hatchery, Meyer, Stromberg’s, Hoovers, Ideal. Most hatcheries that ship birds will have a minimum of 15-25 chicks so they can stay warm enough in transit. If this is more than you want, see if you can find a friend that wants to split the order with you!
Facebook and Craigslist are also sources for chicks, just make sure the breeder is reputable and has healthy birds.
Supplies
You will need a few supplies for raising healthy chicks:
- Brooder
- Brooder bedding
- Heat source
- Thermometer
- Waterer
- Feeder
- Feed
Brooder
The brooder is the actual container the chicks will be housed. I have seen many different brooders- bathtub, aquarium, tent, kiddie pool, pet playpen, pet crate, stock tank, storage tote, and more.
Storage totes are probably the least expensive option, and very popular. Just make sure to get one that is plenty large, as small ones can get too hot. They can also get messy quickly, especially as the birds grow.
Another popular option is a puppy playpen. I like this option as the bedding stays contained, and there is little risk of the birds overheating. Also, it is a fully enclosed unit. You see, the chicks will be able to fly when they are only a few weeks old, and can easily escape a container with no top. These playpens solve that problem.
Brooder Bedding
The brooder needs to have the right floor for the chicks. Slippery floors will cause leg deformities, so things like plain newspaper or plastic should be avoided.
Common bedding includes pine flakes, pelletized bedding, shredded paper, shelf liner, and the like. These can be placed on top of the newspaper if you’d like.
Avoid cedar bedding, straw, and anything slippery. Cedar can cause respiratory problems and death in chickens at any age, and should always be avoided. Straw can hold moisture and mold, leading to a fungal respiratory infection called aspergillosis.
Heat Source
In nature, baby chicks would be with their mother at all times. If they start to get cold, they can snuggle up to mom and warm up. Of course, in the brooder this is not possible.
Chicks need a constant supplemental heat source for the first several weeks of life. If conditions are too cold or drafty they can perish.
Keeping chicks at the right temperature can take a little adjusting, as they need to be kept warm enough, without making the brooder too hot.
Heat Lamp
The traditional go to is a heat lamp. These heat lamps are inexpensive and work well, however, they are extremely dangerous and I highly recommend that they are avoided.
If you are new to my blog, you may not know that I was a firefighter for nearly 10 years before leaving on a medical retirement. I have seen countless fires from heat lamps, including one where the family was brooding chicks in their garage. When the heat lamp fell, they caught the garage on fire. Of course, the chicks died, they lost everything in their garage, and nearly lost their house. Please avoid heat lamps!
If you still continue to use a heat lamp, the brooder should be kept about 90-95 degrees F for the first week of life, and decreased 5 degrees every week. Simply place a thermometer in the brooder and adjust the height of the heat lamp until you reach the desired temperature.
Brooder Plate
A much safer option is a brooder plate. While I prefer the Sweeter Heater, there are a number of different options available. While these are more expensive than a heat lamp up front, they are much safer and cost significantly less to operate. If you plan to raise several groups of chicks, a brooder plate will quickly pay for itself. I also consider the additional expense of the brooder plate to be a “peace of mind insurance”, knowing I decreased my fire risk.
While electricity costs differ, a 250w heat lamp will cost about $30 per month to operate. Most brooder plates are about 25w, and will cost only $3 per month.
Brooder plates heat the chicks differently than a heat lamp. While a heat lamp actually raises the ambient temperature in the brooder (like the furnace in your home heats your house), brooder plates heat with infrared heat.
Infrared heat is like that from the sun or a campfire- the air outside may still be cold, but the sun’s rays are warm on your face. This means that the brooder plate doesn’t heat up the entire brooder, so you don’t need to use a thermometer. In fact, the thermometer won’t give you a good reading with infrared heat.
The plate needs to be low enough that the chicks need to duck their head to get under it, and raised as the birds get taller. To check and see if the plate is working, rest your hand on the surface of the plate. In a few seconds, you’ll feel your hand getting warm.
When Can Chicks Go Outside
While we are on the topic of keeping chicks warm, you may wonder when they can go outside. Ultimately, this will be determined by your location and outdoor temperature.
Chicks can go outside when the outside low temperature matches the target brooder temperature.
For example, in the temperature chart above, a 3 week old chick needs to be kept at 75-80 F. So, if your daytime temperatures are 85 F, but the nighttime low is 65 F, it is too cold for them to be outside. These chicks could be taken outside during the day, but would need to be brought back inside with heat in the evening.
Once chicks are fully feathered, around 6-10 weeks old depending on the breed, they can go outside as long as the temperatures are mild. I would avoid adding a supplemental heat source to the coop.
Waterer
Waterers provide a unique challenge in the brooder. Young chicks are not very coordinated and need an easy to use waterer. These traditional waterers are best for chicks until they are 2-3 weeks of age, and cost only a few dollars.
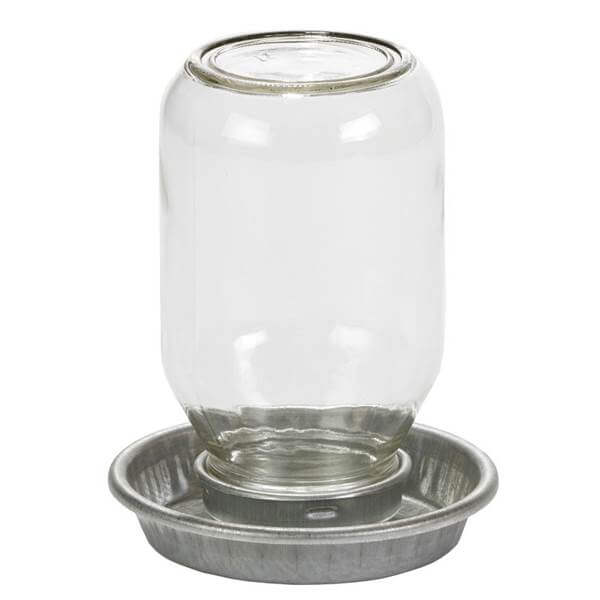
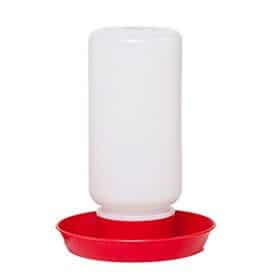
When using these traditional founts, you will find that they quickly become dirty. The chicks will fill the basin with bedding, and get poop and feed in it as well. Sometimes the birds will tip and spill the waterer. When they are 2-3 weeks old, I switch them to a nipple watering system.
Nipple Waterer

At 2 weeks old, chicks are much more coordinated and easily capable of using a nipple watering system. A nipple waterer is composed of a container (like a bucket or juice bottle) with water dispensing nipples. When a chick pecks on the metal pin, it releases water.
These nipple watering systems are fully enclosed, eliminating dirty water. They can’t be tipped so the brooder stays dry, and they don’t need to be filled as often either.
You may have seen the vertical nipples that hang on the bottom of a container. These are not ideal for a number of reasons. First, they are prone to leaking. Second, they require the container to be hung, which can be a real challenge.
I prefer the side mount (or horizontal) nipples that screw into the side of a container. With the nipples on the side of the container, it can be set on a block and doesn’t need hung. Plus, they have a lifetime leak free guarantee.
Keep in mind that not all side mount nipples are made the same. The original nipple is made by Columbus Aqua in Denmark. In recent years they have been copied in China. The Chinese version is not made to the same standard, most notably the pin is extremely difficult to press, has sharp edges, and often leaks. I can only recommend the Columbus Aqua brand, and only the Columbus Aqua has a lifetime leak free guarantee.
I am such a fan of the Columbus Aqua nipple, that Heritage Acres Market is the only US distributor of their high quality nipple waterer. Columbus Aqua has been on the market since 2012 with thousands of happy chicken customers, and has even been featured on Mother Earth News!

Feed
Chicks should be fed a chick starter feed. There are often chick and game bird starter feeds available, be sure to pick the one for chicks. You may also have an option to choose medicated feed.
This chick starter will be the main feed until the birds are about 18 weeks old or laying eggs. Then you can switch to a layer feed.
Treats
Chicks can have treats like mealworms at any time. If you are giving them things other than starter feed, be sure to add a container with grit so they can digest the treats.
Other treat ideas include:
- Fermented Feed
- Sprouts
- Mealworms
- Clumps of dirt and grass
- Garden bugs
Dust Bath
Another great addition to the brooder is a small container filled with dirt so chicks can take dust baths. It is fun to watch them dig in the dirt, and it is great for their hygiene.
Starting With Pullets
If you don’t want to raise chicks, you may consider purchasing pullets. Pullets are mature female birds that are laying or will start laying soon.
Pullets may be more difficult to find and will average $15-30 each. Some feed stores are starting to sell them, but you may have better luck on Facebook or Craigslist. If you are buying from an individual, make sure they are a reputable breeder.
Chicken Coop
The chicken coop is the birds house where they sleep, lay eggs, and get shelter from the elements. Because they do not spend their active hours within the coop, the coop has only minimal requirements.
A chicken coop should have:
- Sufficient square footage
- Proper roosts
- Nestboxes
- Draft free ventilation
- Adequate flooring
- Windows (optional)
Sufficient Square Footage
Even though chickens only sleep and lay eggs in the coop, it still needs to be big enough for them to be comfortable. At a minimum, the coop should offer 2-3 square feet per bird.
With the 2-3 square foot per bird guideline, a flock of 6 chickens would need a 12-18 square foot coop (or about 4’x4′), and a flock of 12 birds would need a 24-36 square foot coop (about 6’x6′).
Coops should also be built bigger than you need- chicken math is a real thing!
Proper Roosts
The roost is where chickens sleep at night. Each bird should have 10 inches of roost space. Roosts should be about 12 inches from the wall.
The best roost is a 2×4 turned sideways, so they perch on the wider part. Thick branches or ladders can also be used.
Roosts should be wide enough so the birds are not only comfortable but can also cover their toes in cold weather. If a roost is too narrow and their toes wrap around it, they won’t be able to cover their whole foot with feathers which could potentially lead to frostbite.
Nest boxes
Nest boxes are an important part of the coop. Properly placed and sized boxes will make life a lot easier as chickens will lay their eggs here. If boxes are not the right size or easy to get to, the chickens may lay eggs in other places.
Nest boxes should be about 12 inches cubed- 12 inches tall, wide and long.
Chickens will share nest boxes and take turns laying eggs in them. As such, only one box is needed for every 5 birds.
Boxes can be just about any height off the ground, or even on the ground. But they should be at a comfortable height for you to access and clean. Regardless of the height of the boxes, make sure the main roost bar(s) are higher than the boxes! It is a birds natural instinct to sleep on the highest perches first, and if they sleep on the nest box perch, they may poop in the next box. Placing the boxes and box perch lower than the main roost will reduce the likelihood of sleeping in the boxes.
To make collecting eggs easier, the boxes should have an outside access door. It is easier to open a door from the outside than have to walk into a dirty, dimly lit coop to search for eggs.
Chickens also seem to enjoy loose curtains on the box entrance for added privacy, however, this is not a requirement.
A few lessons learned from my own experience- add a tub to the box, and place perches to reduce sleeping in the nest box.
If I could build my nest boxes again, I would size them so I could add a tub (like this dishpan) to make cleaning easier. It would be so nice to be able to lift out the tub, clean it, and replace it. It can be a challenge to scoop out bedding from the boxes.
I also wish that I had built the perches outside of my nest boxes differently. Because the perches are so close to the nest box and higher than their roost, a few sleep on these perches, the birds poop in the nest boxes. It’s quite annoying!
Draft free ventilation
Believe it or not, chickens release a lot of moisture. Between breathing, pooping and simply being in the coop, it can become a humid place.
Humidity is not good to have in the coop, as it can lead to issues like mold or frostbite. While most chickens can tolerate cold well, cold and humid makes them more susceptible to frostbite on their comb, waddle, and toes.
To reduce the buildup of moisture, add vents to the peak of the coop’s roof. Two small vents should be adequate, but avoid putting a vent on the windward side.
To prevent creating a draft that could chill the birds, place the vents as high as possible above the roost.
Adequate flooring And Bedding
Having the proper flooring and bedding in the coop will prevent many frustrating problems.
If the coop is a lean to style with dirt floor, it can be left as is. Our coop has a dirt floor, and maintenance is low.
If the coop has a wooden floor, paint the floor with latex paint or add linoleum before adding chickens. This extra step will seal out moisture and make spraying off poop easier.
To make cleaning even easier, bedding can be placed on top of the painted floor or linoleum. Bedding suggestions include pine shavings, pine flakes, pellet bedding, sand, hemp bedding, rice hulls, or shredded paper.
Never use cedar bedding or straw with chickens. Cedar can cause respiratory problems and death in chickens, and straw can hold moisture and mold, leading to a fungal respiratory infection called aspergillosis.
Windows (optional)
Windows are a nice addition to the coop, but they are not necessary. If you do choose to add them, try and place the windows where the winter sun will warm the coop, but the summer sun won’t shine in and overheat the birds.
Windows can be recycled windows or simply plexiglass. Consider covering the window on the inside with chicken wire to prevent birds from flying into it and hurting themselves.
Prefabricated Coops
We have all seen the cute little prefabricated coops online or at the feed store. They have a small coop with an attached run, like the one below.
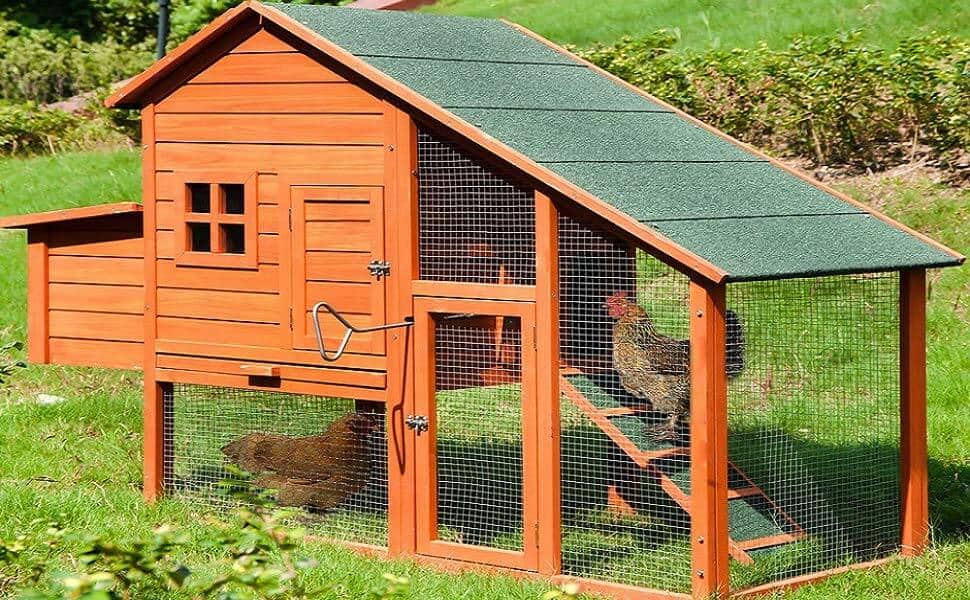
While these prefabricated coops are cute to look at, I would avoid them at all costs. They are poorly made, not predator safe, and are far too small for even a single chicken. For the high cost of these coops, you can build a better quality coop if you are even a little handy.

Chicken Run
The run is the cage or pen that attaches to the coop. For some, the run is a temporary holding area before the chickens are let loose to free range. For others, the chickens run is their only outdoor access.
Most sources recommend the run to be 10 square feet per bird. Sticking to this, and a flock of 6 would need 60 square feet (or 6′ x 10′), and a flock of 12 would need 120 square feet (10′ x 12′).
Undersized runs can lead to feather picking, cannibalism, bullying, and a rapid buildup of poop. Much like the coop, the run cannot be too big. Because you’ll likely add more chickens down the road, build it as big as possible. Even if you don’t add more chickens, they will appreciate the additional space.
Dog kennels make great chicken runs, or you can make your own. There are a few suggestions from experience that will make chicken life a little easier.
Build the run taller than you are. It’s no fun to have to hunch over the entire time you are feeding, watering, or cleaning the coop.
Line the bottom of the run with 2 foot wide 1/2″ hardware cloth. I have had numerous experiences with predators like coyotes trying to pull a bird through the chainlink, or baby chicks slipping through and becoming separated from mom. Both of these can be solved by attaching 1/2″ hardware cloth along the perimeter of the entire run. Hardware cloth comes in 24″ or 36″ wide rolls- the 24″ works perfectly. This is also the one time that chicken wire could be used, but I would still avoid it.

Avoid Chicken Wire. I see so many people that build beautiful, elaborate, expensive chicken coops and runs, and use chicken wire. Chicken wire is useful for keeping chickens OUT of things, ie flower beds, but it will serve no protection from predators. Coyotes, stray dogs, and raccoons can all easily break through chicken wire. While I will cover more predator control tips below, always use welded wire fencing, hardware cloth, chainlink, or feedlot panels instead of chicken wire. The added cost will reduce heartache later.
Add a roof. While most breeds of chickens are terrible flyers, adding a roof is an extra layer of security to keep your birds safe from predators that can fly or climb. I have had a few birds fly over a 6 foot fence- a leghorn and an Egyptian Fayoumis. Also, if you decide to add something like a pheasant or guinea fowl later on, you’ll already have the necessary roof in place.
Add skirting. To prevent digging predators from getting to your flock, skirt the perimeter of the run with welded wire, chain link, or hardware cloth. The skirt should attach securely to the run and lay on the surface of the ground, on the outside of the run. A thin layer of dirt or rocks should be placed on top of the skirt to eliminate any wrinkles. We recently had a badger try to get into our chicken run, and the welded wire skirt kept him out.
Run Additions
I like to add a few extras to my run, mostly for the sake of happy chickens.
Each of my runs has a dust bath. A dust bath is how the chickens clean themselves, so this is a necessity. Most of the time the chickens make their own by digging a hole in the dirt, but I will then add peat moss, First Saturday Lime, and fireplace ash to keep the dirt soft and help repel pests like mites and lice.
SAVE 20% OFF YOUR FIRST SATURDAY LIME ORDER WITH CODE HERITAGEACRES
I also like to add a few toys to keep them entertained. While one of my runs has a swing, the chickens don’t use it. They do like hanging treats, and these keep them busy for a long period of time.
I like to hang dried corn on the cob for squirrels in a corn hanger. I also made a large hanging platform and keep a flock block for the birds to peck at. Hanging it also keeps it away from mice and snow.
Feeders & Feed Options
Feeders and waterers should only be located in the run, and never in the coop. While you could use the old fashioned feeders and waterers, there are a number of newer designs that will make life a LOT easier and save you a ton of money in the long run.
Feeders
I recommend a treadle style feeder. These feeders have a step that opens a door, giving chickens access to the food. Treadle feeders have several benefits. First, they keep the feed dry in rain and snow. Second, they often hold a large capacity of feed, which is great for people that travel. Most importantly, it keeps rodents and stray birds from eating the feed. Not only do they consume a large volume of feed that can get expensive, but they also bring diseases that can be transferred to chickens.
I used to have a pig feeder for my chickens, I liked it because it held a full 50-pound bag. It wasn’t long before the starlings found it, and would flock en masse. After switching to a treadle feeder and no longer feeding the starlings, I found that feed usage went down by half.
Feed
There are a number of different feed options, and it mostly comes down to your (and your chickens) preferences.
Pellets, crumbles or mash
Pellets, crumbles, and mash is the physical shape of the feed. They all could have the same ingredients, they are just different sizes and shapes.
Pellets are small compressed cylinders, similar to rabbit food.
Crumbles are broken up pellets. They are little crumbles pellets that are broken into small clusters.
Mash is a fine, powder like feed.
While I personally feed crumbles as they fall through my treadle feeder better, you can pick whichever your birds like best and what works for your situation.
Layer feed, feather fixer, meat bird, or all flock
Feed comes in different protein percentages depending on the type of bird consuming it. For laying hens, a 16% layer feed is ideal.
Feather fixer is a high protein feed that is useful for show birds or during the molt. Meat bird feed is for birds being raised for meat. All flock feed is for folks that have a variety of bird species mixed together in one flock.
Organic, Vegetarian, Soy Free, Corn Free
To add another level of options, feed comes in some different specialty choices like organic, vegetarian, soy free and corn free.
This definitely comes down to your preferences, as the chickens likely don’t care. Since the feed your give the birds will be reflected in their eggs, you may opt for a specialty feed. For example, if you are sensitive to soy, you can choose a soy free feed and that may make the eggs more digestible for you. There are many folks that cannot eat commercially raised eggs, but can eat eggs from their flock that are fed a specialty feed.
Scratch Grains
Scratch grains are intended to be a treat for chickens. Overfeeding scratch can lead to several health problems like fatty liver, so it should be reserved for an occasional treat.
Fermented Feed
Fermenting feed is a great way to reduce feed costs while giving the birds more nutritious easily digestible, probiotic filled feed. Since fermented feed is a detailed topic (but easy to do!), you can read more about it here.
Kitchen Scraps
Kitchen scraps are also a great way to offer variety and reduce feed costs. Chickens can eat nearly everything we do. For the ultimate list of what chickens can and cannot eat, please take a look here.
Alfalfa
In each of my runs, I like to add a hay hanger with a flake of alfalfa. Greens are a great addition to birds diet, and if you free range your chickens you’ll see them eat a variety of grasses.
Grit and Calcium
Chickens also need grit and calcium in their diet.
Grit serves as a grinding stone in their gizzard to break down things they eat before it moves into their stomach. If your birds have a dirt floor in the run or are free ranged, they do not need supplemental grit but you can still offer it to them. Grit is inexpensive, and I like to use these rabbit feeders as a dispenser.
Calcium is needed for laying hens. Without added calcium, egg shells can be thin and brittle, potentially breaking inside the hen. Sometimes eggs are even laid without a shell. Oyster shell is an inexpensive source of calcium, about $12 for a 50 pound bag. Depending on how many chickens you have this bag will likely last a year or more. I use the same rabbit feeders to provide free choice oyster shells.
Feed Storage
A quick note about feed storage- keep bags of feed in metal trash cans!
Leaving bags on the ground or in a shed will undoubtedly lead to mice getting into the feed. The cheapest way to circumvent this is a 31 gallon metal trash can which you can pick up for about $25 at Lowe’s or Walmart. I can fit three 40 pound bags or two 50 pound bags in each can, and this keeps it safe from pests and moisture.
Waterers
Providing water to the flock is another pain point for many chicken owners. Traditional style founts get dirty quickly. Other waterers grow algae quickly. Some are heavy and need to be hung.
Chicken Nipples
I have been able to solve all of these water issues with horizontal nipple waterers. Yes, they are a funny name, but they are truly the ideal waterer.
There are a number of chicken nipples on the market today. Vertical nipples, horizontal nipples, and watering cups.
Vertical Nipples
Vertical nipples hang from the bottom of the bucket, allowing the chicken to tap a metal pin to release water.
Pros: Keeps water clean, can be used on a 5 gallon bucket, suitable for use with chicks
Cons: Notorious for leaking, heavy container must be hung, will freeze and break in cold temperatures
Horizontal Nipples
Horizontal (or side mount) nipples screw into the side of a container. Like vertical nipples, chickens press a metal pin to release water.
Pros: Can use on any plastic container or PVC pipe including buckets, juice containers, and 55 gallon drums, keeps water clean, the container does not need to be hung, can be used with chicks 2+ weeks old, does not leak, nipples do not freeze
Cons: There are many counterfeit ones circulating that leak (only use Columbus Aqua brand), have sharp edges, fall apart, and are simply dangerous
I use the Columbus Aqua horizontal nipples on a 55 gallon drum for my 50-ish chickens. The great thing about this setup is I only have to fill it every few weeks. I could even add a float valve and never have to manually fill it again. This makes it so easy when I go on vacation!
An important note: Columbus Aqua nipples are the original horizontal nipple and are made in Denmark. Recently, a number of Chinese manufacturers copied the Columbus Aqua design but used poor quality pins, springs, and o rings. These knockoffs are difficult for chicks to use because of stiff springs, and they also have very sharp edges. There are also reports of them leaking or falling apart draining the watering container. Avoid these cheap copies and only trust Columbus Aqua with your flock!
Watering Cups
Watering cups are similar to horizontal nipples, except there is a physical cup that fills with water.
Pros: Easy for birds of any age to drink, the container does not need to be hung
Cons: Cups become dirty quickly, cups can grow algae, cups can easily break off and leak water from the container
Winter Water
If you live in an area that freezes, you’ll need to combat frozen waterers in the winter. For more information on winter watering options, see this article.
Predators
In the words of my wise father, “everything loves the taste of chicken”. Unfortunately, he is right.
Keeping chickens protected from every possible predator is almost impossible. Some common predators, in no particular order, include:
- Coyotes
- Stray dogs
- Fox
- Badgers
- Raccoons
- Snakes
- Hawks
- Mink/weasel
- Bears
- Wild cats
- Opossum
- Skunks
- Rats
Clearly, protecting chickens from all of these dangers is almost impossible. However, a well built coop and a sturdy run with the additions mentioned above will eliminate or significantly reduce most risks.
To further protect your birds, only free range them with supervision. I have had coyotes pick up chickens in the middle of the day, while we were outside. Because of this, I will never let my flock out unless I can be outside watching them.
Adding a few guinea fowl to the flock will also help, they are much more attentive to dangers and will sound the alarm if they spot a hazard. I always keep 2-3 guineas with my chickens for this reason.
A livestock guardian dog is also a potential solution if you have the option.
Health Issues
Generally speaking, chickens are pretty healthy birds, but they can fall ill. Common ailments include mites and lice, worms, respiratory illness, and traumatic wounds.
I recommend anyone with chickens to have at least a basic chicken first aid kit handy in order to be prepared for an emergency. It always seems that things happen late on a weekend when feed stores are closed, or they need a medication that will take a few days to show up in the mail.
For more information on chicken ailments, I created the Backyard Poultry Health Guide: Diagnosis & Treatment ebook. This book has over 50 pages detailing common illnesses and their treatments.
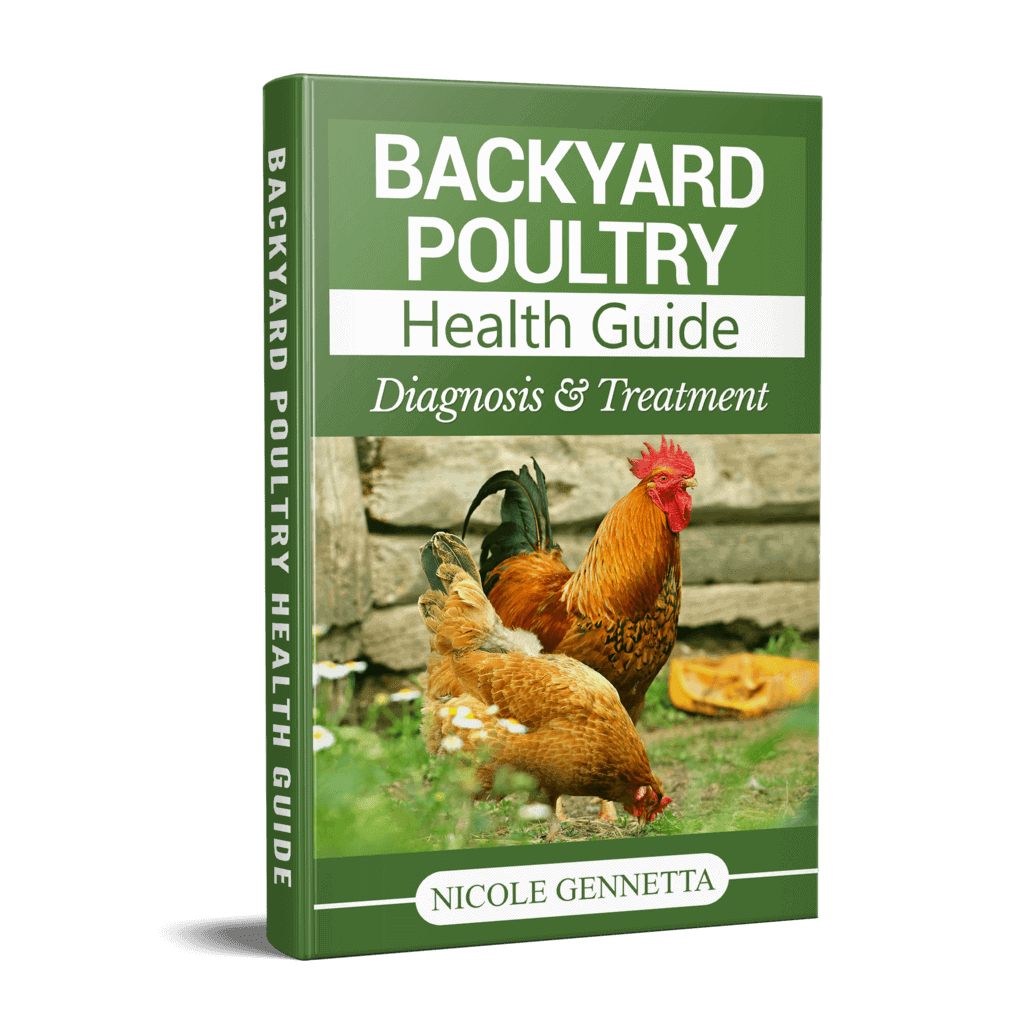
BACKYARD POULTRY HEALTH GUIDE: DIAGNOSIS & TREATMENT EBOOK
Be sure to pick up our eBook Backyard Poultry Health Guide: Diagnosis & Treatment eBook for more great information on raising chickens!
Cold Weather Care
Chickens are remarkably hearty and do well in cold climates. For more information on caring for chickens in the winter, take a look at some of my other articles:
- Should Chicken Coops Be Heated?
- How To Keep Chickens Water From Freezing
- Chickens in Winter: Why Aren’t My Chickens Laying Eggs?
- Dangers of Heat Lamps and Safer Alternatives- A Backyard Bounty podcast episode
Additional Resources
If you are looking for more information on raising chickens, consider perusing my blog for additional articles.
If you have specific questions, the Facebook group Hens & Hives is a great place to get answers.
The Chicken Behavior And Welfare course by the University of Glasgow is completely free and filled with useful information.