

Being an avid gardener, the idea of a planter within our chicken run was REALLY appealing. However, chickens are quite destructive to flowerbeds, and I knew that a standalone planter was never going to happen. Plus, we live in a very hot, windy and dry environment. It is not the easiest to get things to grow here when the summers highs are in the 100’s on a daily basis.
Typically we feed our birds fodder by sprouting it indoors, and trimming off the tops of the greens to give to the flock. This works well, especially as our Essential Nutrients Seed Blend sprouts fast and grows even faster. But, again, I REALLY wanted a planter inside the run.
I decided to create a little planting bed that is chicken proof, and allows us to grow the Essential Nutrients Seed Blend for the birds foraging pleasure.
This simple planter is a 2×4 square, covered with hardware cloth. We made a few improvements to the design along the way, read on to learn how to build one of these for your birds!
Table of Contents
What you’ll need:
- 2- 2×4’s
- 2- 1″x8′ furring strips
- 1- Roll hardware cloth (either 1″ or 2″)
- 2 1/2″ screws
- Stapler or poultry staples
- Soil
- Essential Nutrients Seed Blend
- Drill or Screwdriver
- Hammer (if using poultry staples)
- Newspaper (optional)
- Landscaping cloth (optional)
- Polymer crystals (optional)
- Hinge and Latch (optional)
- Straw (optional)
Step 1
Cut the 2×4’s and furring strips to 46″ long.
Because the hardware cloth is 48″ wide and I prefer to have an overlap (so toes don’t get caught), I like to cut the wood down to 46″. If you prefer, you could make your planters 24″ wide and however long you’d like, making the planter the same width as the hardware cloth. This would eliminate the need of an overlap, and would allow the planter to fit in smaller locations easier.
For the sake of the photos, I cut the wood to 46″.
Step 2
Assemble the frame. Simply screw the 2×4’s together to create the planter frame. 2×4’s should be assembled such that the planter is 4″ tall (instead of 2″ tall).
Step 3
Assemble the wire top. First, lay out the furring strips into a square, and secure the corners with wood corner braces. I stapled this, as screws only cracked the wood. You could also nail them together.
Once the frame is completed, flip over and attach the wire to the underside of the frame. I stapled the hardware cloth to the furring strips with 3/4″ narrow crown staples using a DeWalt stapler.
Optional- If you wanted to get fancy (and were more skilled than myself), adding a hinge and latch to the lid would make future plantings much easier.
Step 4- optional
Attach landscaping fabric.
I added the landscaping fabric to serve more as a bottom to the planter. This helps hold in the dirt if the chickens scratch around the edge of the planter, and reduces water runoff. Although optional, it does help.
Step 5
Move planter to desired location. A level surface is ideal. The Essential Nutrients Seed Blend grows best in sunny or partly sunny locations.
Step 6
Now it’s time to start putting everything together. If you can keep the chickens out of the work area it will make life a little easier, because they will make it a point to be in the way the whole time. Ask me how I know!
Due to the aforementioned dry heat, I added a layer of newspaper to the bottom of the planter. The newspaper will help hold in a little bit of moisture. You can usually get a stack of free classified ads at the local gas station.
Next, I added a bag of topsoil. These bags were $1.77 each at Walmart. On top of the first layer of soil, I added a layer of polymer crystals. These work great to hold water at the root level, making it easier for the plants to stay hydrated even in the desert climate we are in. If you add the polymer crystals, be careful to keep the birds from eating them!
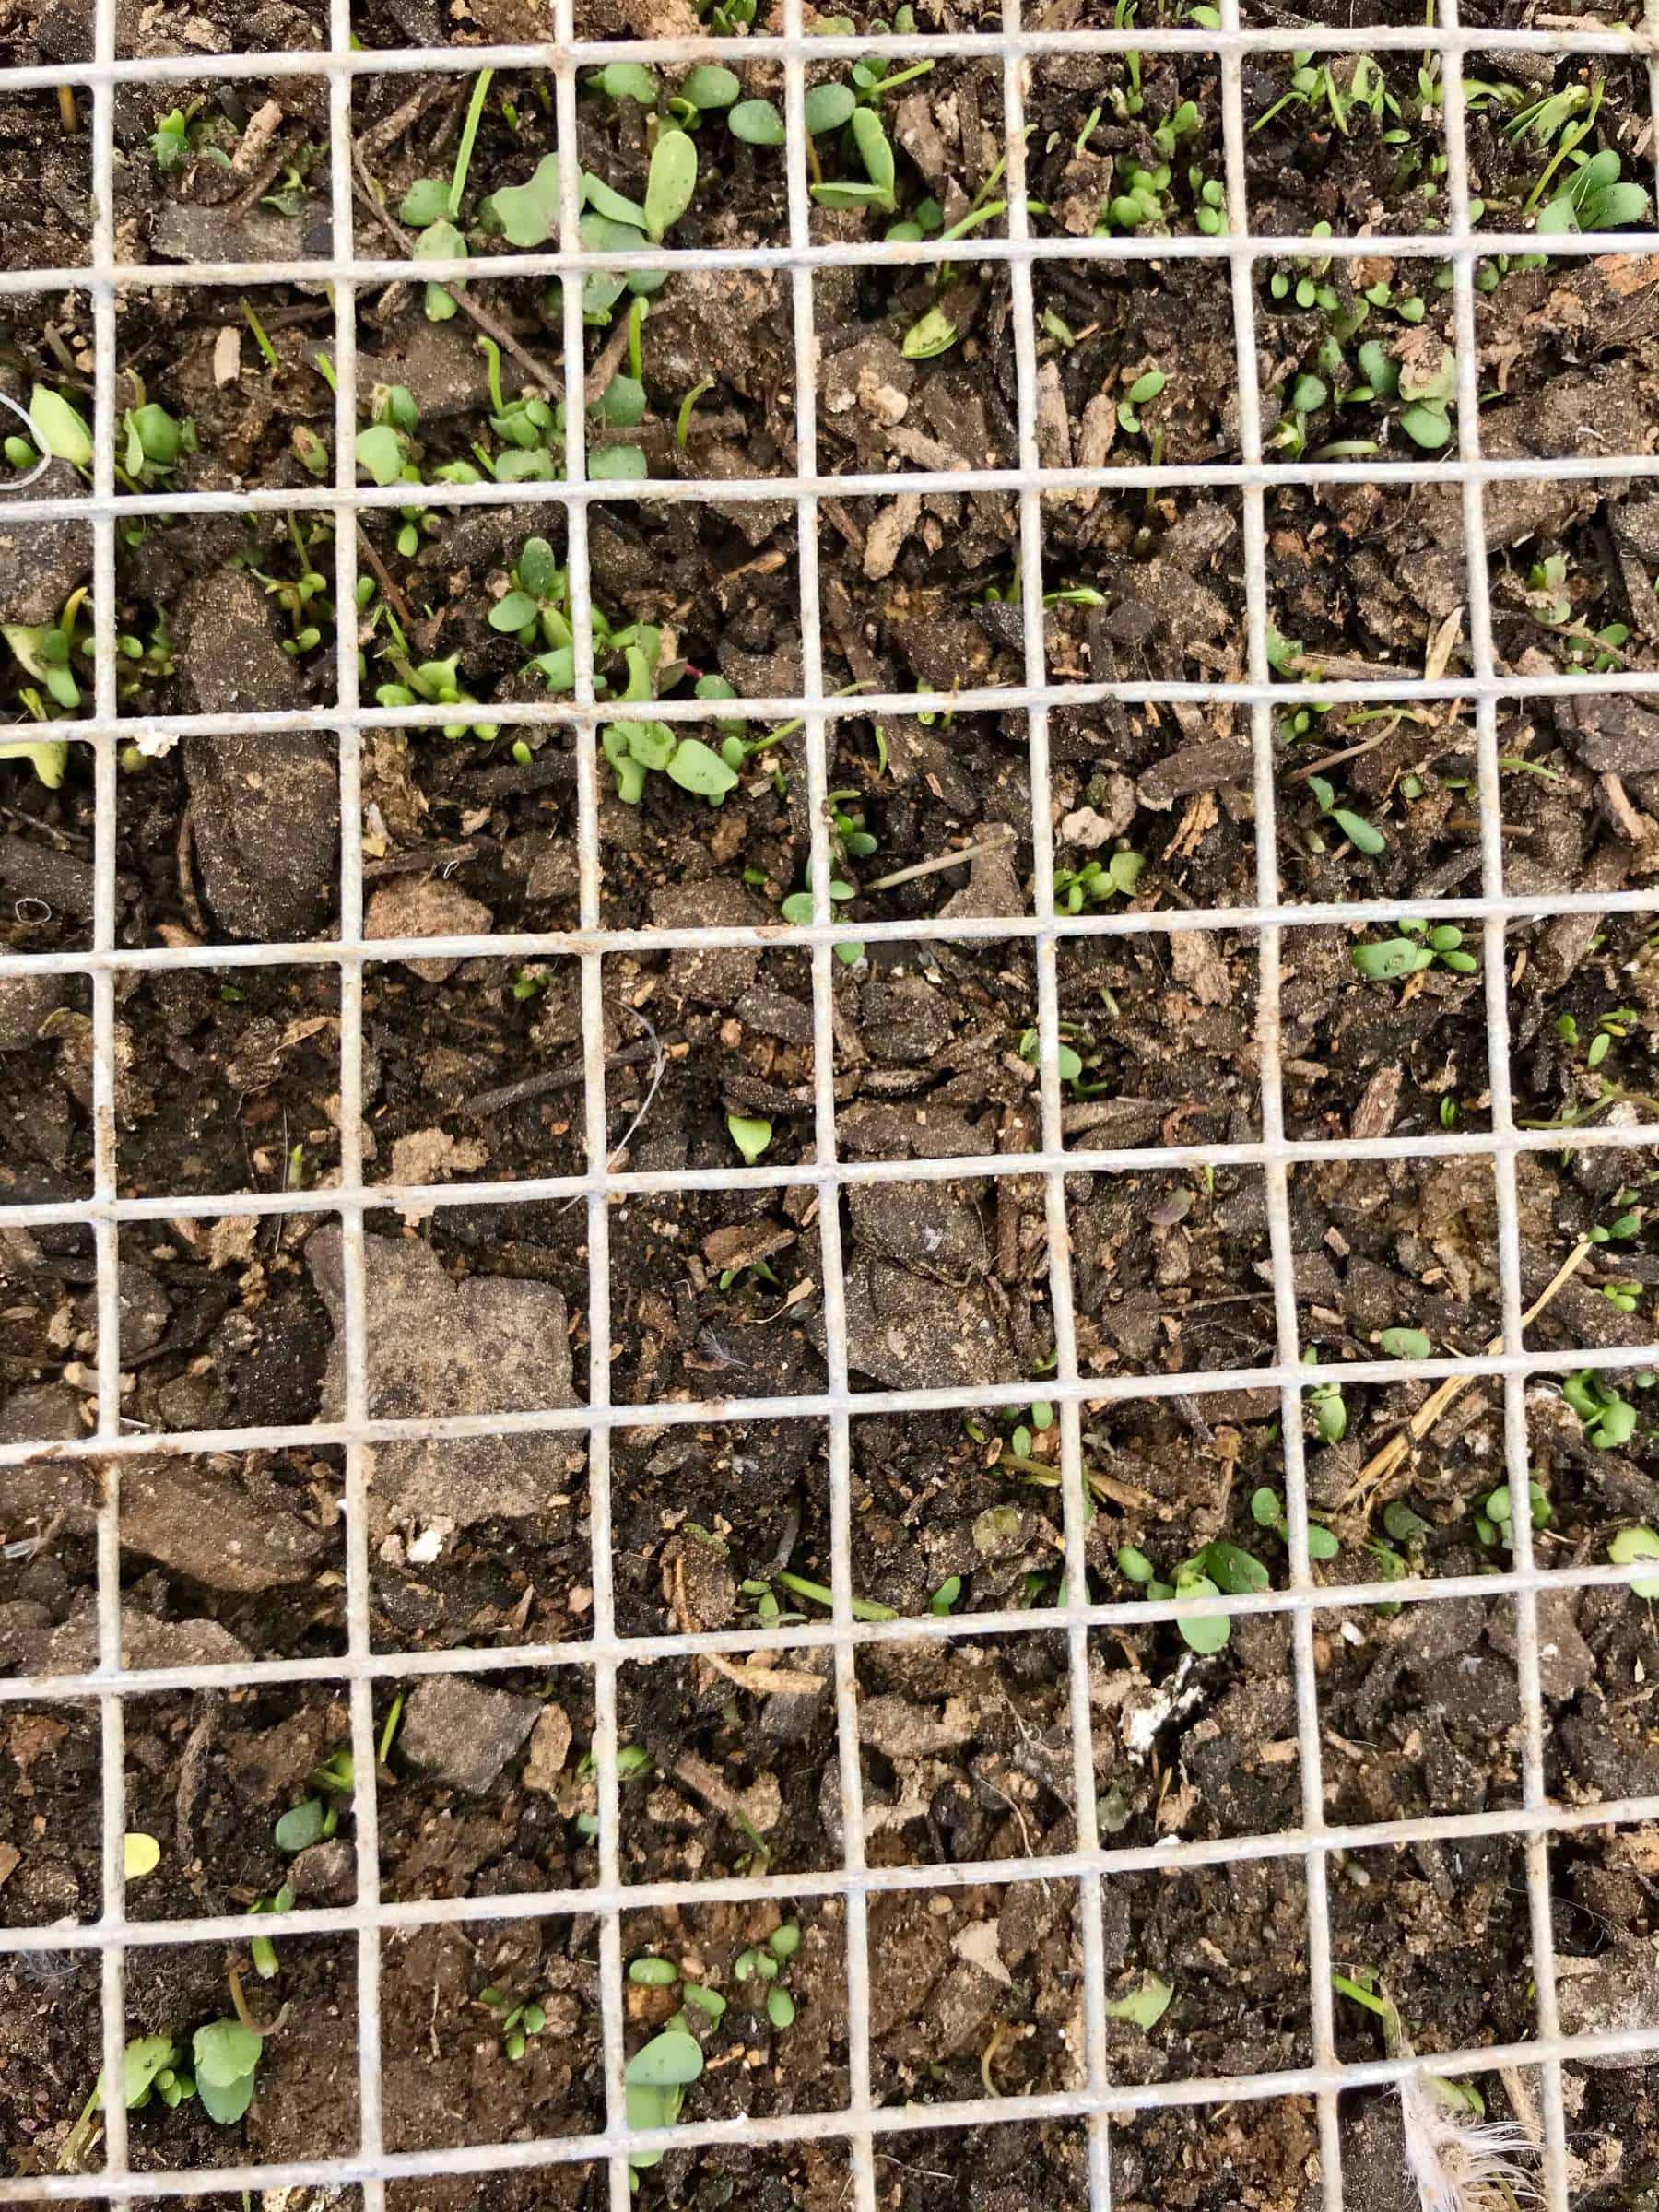
On top of this I added another bag of topsoil, and then a generous sprinkling of the Essential Nutrients Seed Blend. This planter used about 4oz of seed. I topped this off with another bag of topsoil.
Tip– Although the wire keeps the birds from scratching the dirt, it also stops the birds from pulling out the delicate sprouts. By the time the greens are long enough for the birds to nibble on, the plants have a strong enough root system to prevent them from being pulled out. Also, the wire will sag slightly with the birds standing on it, and if the soil is too close to the wire they can fit their beaks between the wire and pull out seeds and seedlings. Be sure to leave a gap of about 1″ between the top of the soil and the wire to allow the seeds to grow some before the chickens can get them.
Caring for your planter
After assembling the planter, water thoroughly. If you used polymer crystals, you’ll want to add enough water for them to expand to full storage capacity. Water the planter daily for the first week. We planted our seed mix on Monday morning. By Friday the seeds had sprouted.
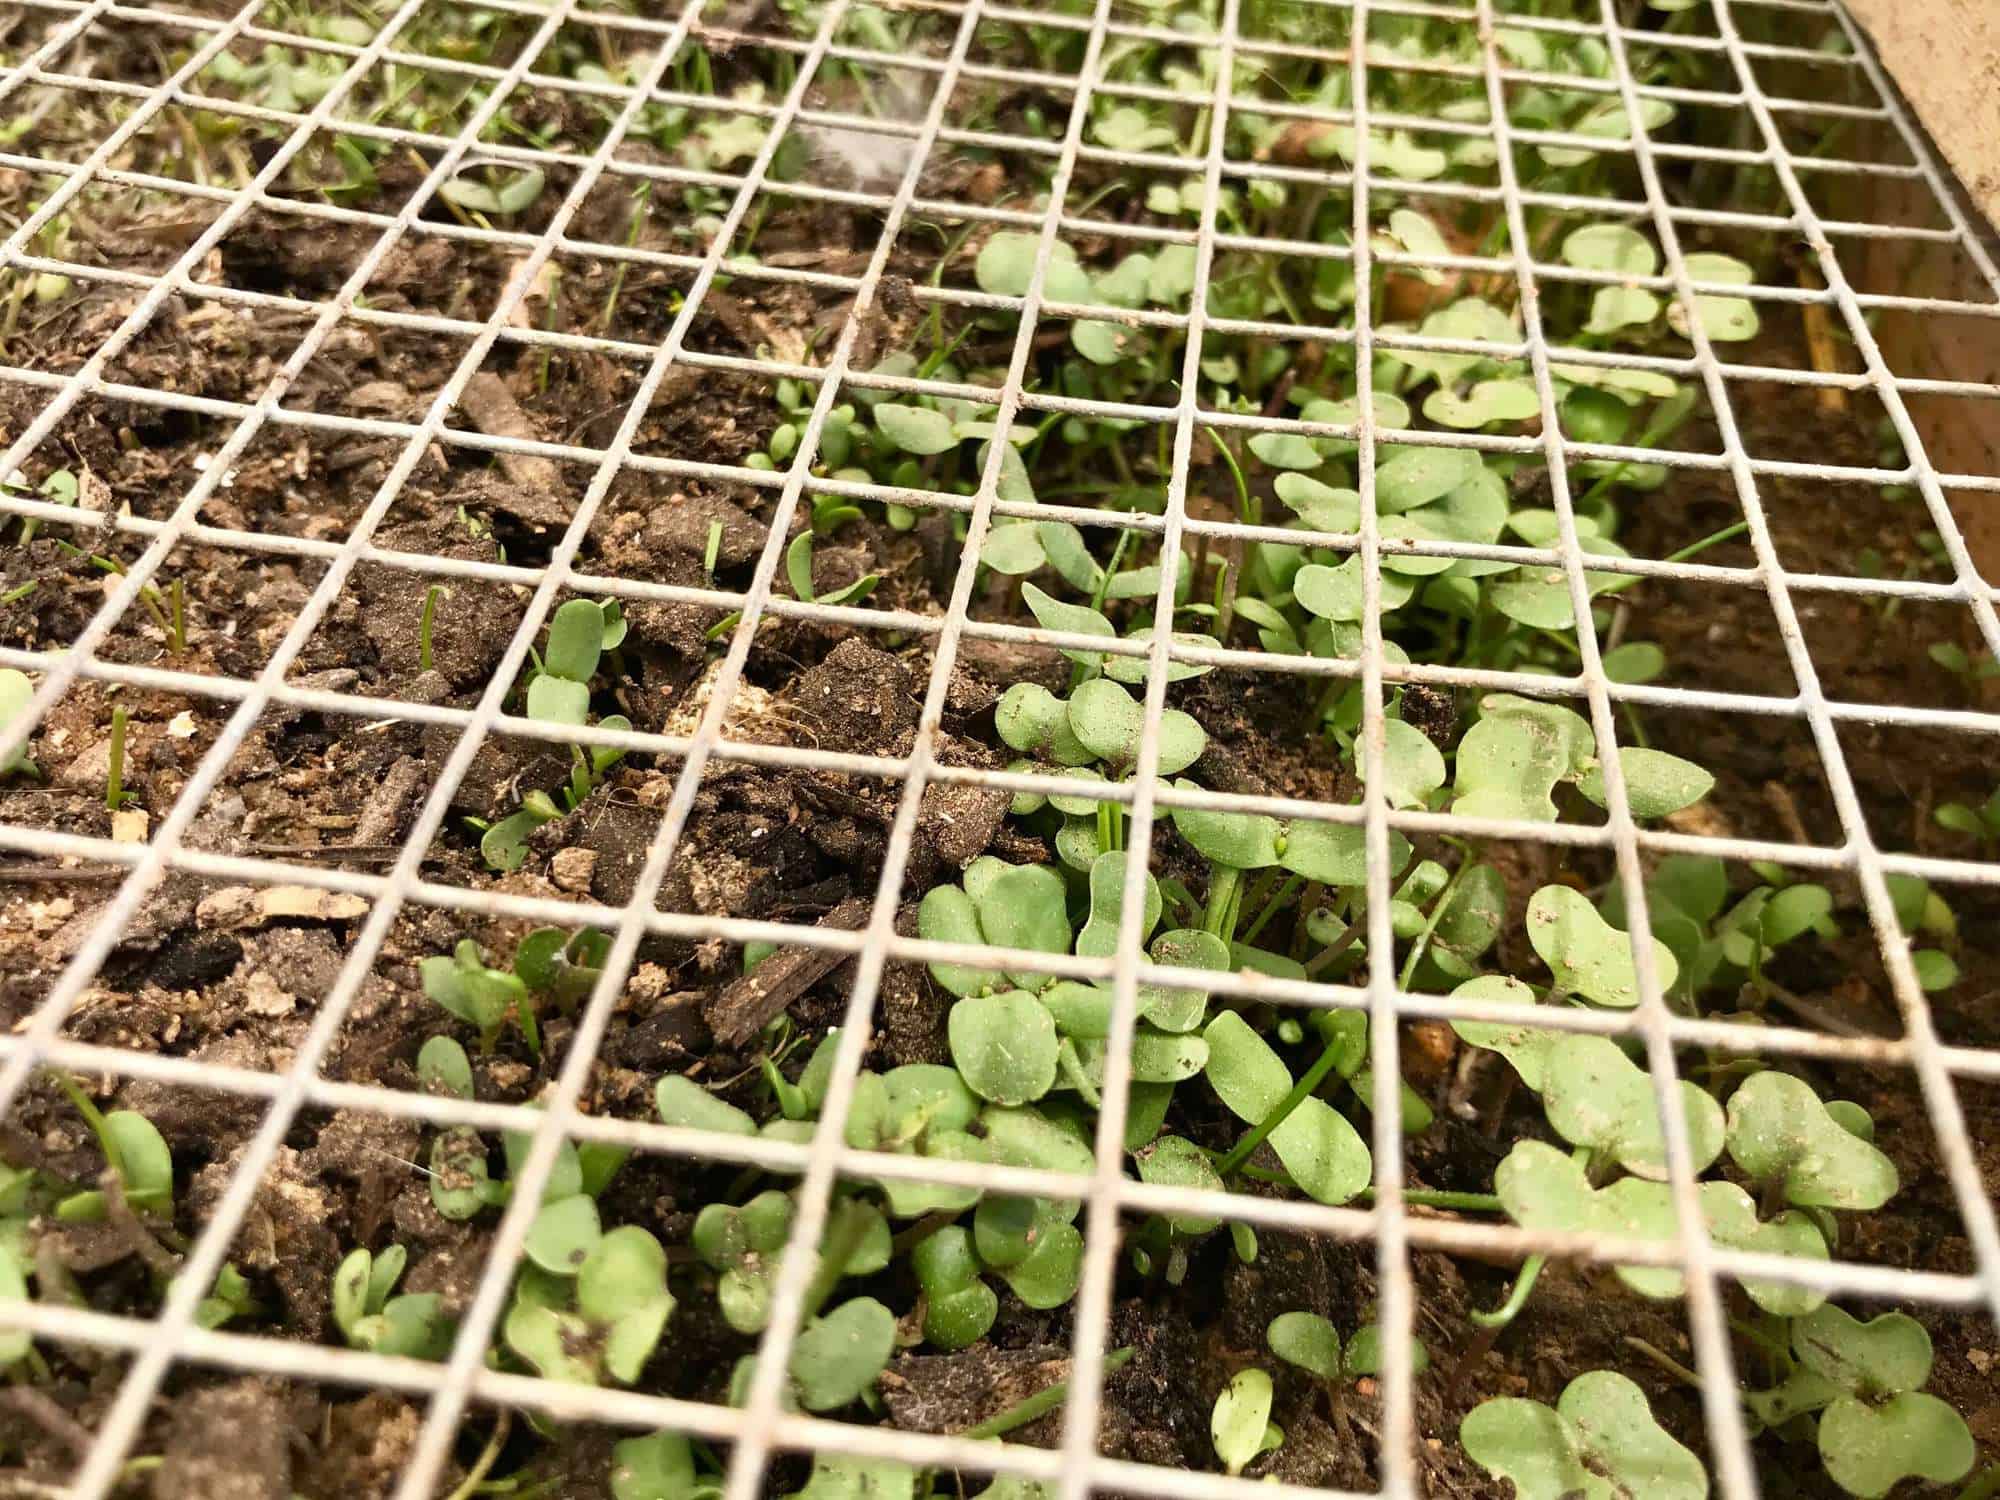
Little maintenance is needed other than water as needed for your climate. The seed mix does well in slightly moist soil, but be sure it does not stay too wet.
Suggestions
After creating our planter bed, we came up with a few suggestions that would make for the perfect fodder planter.
>> Using better quality 2×4’s will reduce splitting. We purchased the cheapest ones and had a lot of problems with the wood splitting during assembly. A better quality 2×4 would have prevented this.
>> Add hinges to the lid. We stapled the lid in place. In hindsight, I wish I had added a hinge, to allow for easier access in the future. Because the planter will last many seasons, it would be great to make it such that you can open the lid to either add herb plants, or till in dead fodder at the end of the season.
>> With the Spring winds and 100 degree days, the top of the soil in our planter dried out quickly. If I could have done it differently, I would have used 2×6 wood and left more of a gap between the soil and the hardware cloth. I would have then added a thin layer of straw to help retain moisture.
>> In hindsight, I wish I had added some support under the wire- maybe in the form of wood strips or hog paneling.
Ruth
Sunday 17th of September 2023
I live in the UK but this article is fascinating, and SO helpful! I've enjoyed several of the other pieces as well, so I must sign up:-) Very best wishes, from damp and somewhat dreary Brum - that's what locals call Birmingham in England. Ruth in Brum.